The camera-lens combination I’ve been using is a Nikon D7200 with a Nikon AF-P 70-300mm 4.5-6.3 VR zoom lens.
Through trial and error, I’ve established that my most successful initial set-up is on Manual, with ISO set to auto, an aperture of f10 and a shutter speed of 1/500.
If it’s a still day and things aren’t moving about (and if I have time – the subjects don’t always give it to you), I’ll bring the shutter speed down. In the right conditions, with VR, I can get away with speeds of less than 1/100 at 300mm (giving a lower ISO figure and less noise). The shot below was at 260mm, f10, Shutter speed of 1/80 and the auto ISO came in at 100.
Then again, higher ISO doesn’t seem to affect the quality of the image too badly. Modern DSLRs seem to have made big strides in this area in recent years.
To illustrate the point, I’m using the picture below of a robin. Before taking the shot I had set the shutter to a fast speed of 1/2000 as I was trying to get pictures of another bird in flight. I didn’t have time to change it before I took this picture (I liked the pose of the bird, listening for the sound of moving insects below – very robin-like – but of course it could have moved at any moment). Even as is, with an unnecessarily fast shutter speed and correspondingly high ISO, the quality of the picture looks good to me. The details of the bird itself are smooth and crisp and the nicely gnarled fence post doesn’t look too noisy either. The settings were 300mm, f6.3, shutter speed 1/2000, with an auto ISO that came in at 2,200.

After focus, the important things to get right are, as always, the f-stop and the shutter speed: the depth of field you want with the f-stop, and a fast enough shutter speed (or in the case above unnecessarily fast) to avoid motion blur. If you haven’t got these right, or right-ish, having a low ISO won’t make the picture any better.
I’ve found that when using Aperture or Shutter priority on the Nikon D7200, the algorithm Nikon uses seems to be slanted towards maintaining a low ISO, keeping it as close to 100 as it can, which sometimes, it seems to me, is at the expense of f-stop or shutter speed (depending which priority setting you’re on).
On Manual, you can set the speed and aperture at levels you think necessary, and let the ISO take care of itself on auto. If your ISO levels are high and you want to get them lower, and you have time, then increase the aperture and/or decrease the speed – whatever works best for the picture you’re taking – to get the ISO down. The important thing with fast moving subjects is to get into the right position quickly, get the image in focus quickly and take your shot. Before the subject – and the shot – has gone.
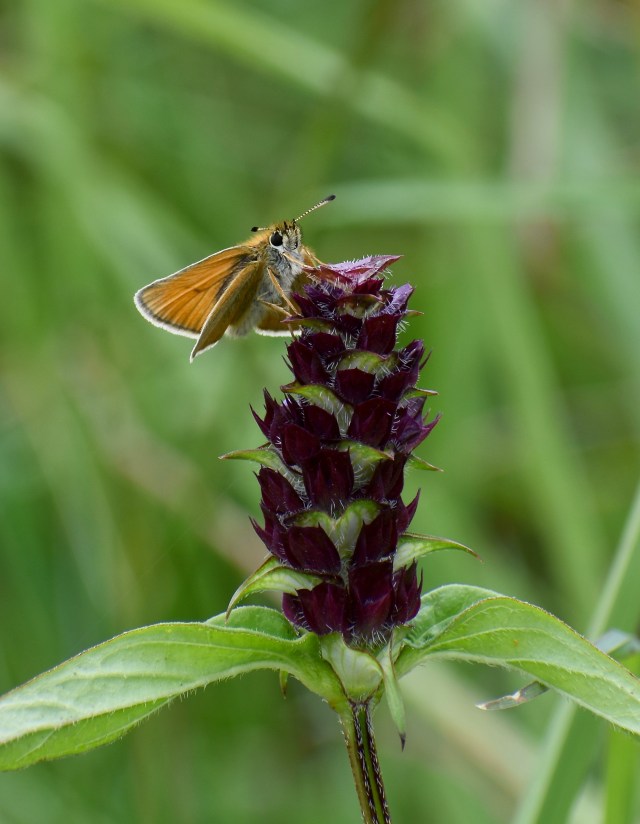
When I’m as close in as I can get with this lens (1.1m) and I’m zoomed right in at 300mm, the depth of field can seem shallow, even at F10. If your taking a picture of a butterfly with its wings open flat-on to your camera, and its antennae are in the same plain, most of it – the wings, the body the antennae – will be in focus even with a relatively large aperture. When you’re taking a picture where the butterflies wings are partly open and/or it’s in three quarters view, you’ll have to make choices about which parts it’s important for you to keep in focus. For me, it’s the head and eyes and at least one of the antennae. You can only get both antennae in focus when the butterfly is looking straight at you, or both antennae are somehow in the same plain and distance from your lens. I will sometimes try going up to a higher F stop if the image might benefit, and perhaps slow down the speed to compensate (and try hard to keep the camera extra steady). But I’ve also had some decent results with larger apertures too. The 300mm picture below was at f8, shutter 1/640 and ISO of 200.
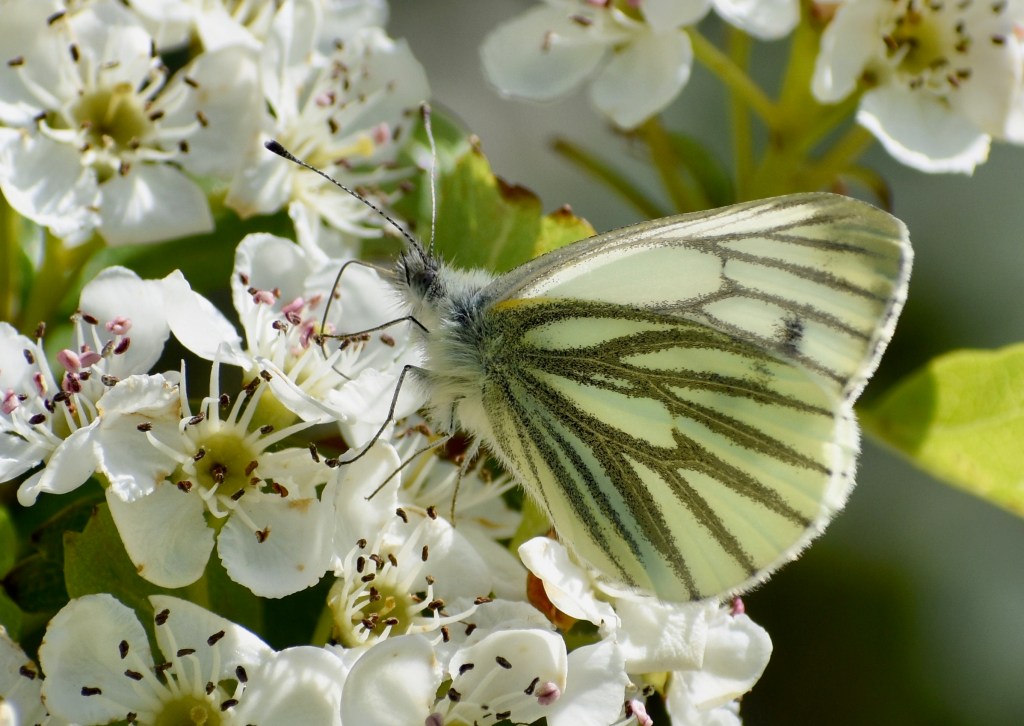
The closer antennae is pretty much in focus, as is the eye and the fur of the body. The rear edges of the wings are less sharp, but I can live with that: I don’t think it matters too much in this picture as the eye is drawn towards the in-focus head of the butterfly by the direction of the veins on the wings. And from there on to the fresh hawthorn blossoms surrounding the butterfly. (There’s also a happy accident in this picture that the colours of the blossom, the white, olive-green and yellow, echo the colours of the butterfly.)
I’ve read that zoom lenses tend to be at their best in between the two extremes of the zoom, so sometimes I’ve tried taking pictures at 260mm, say, rather than the full zoom at 300mm. I’ve had good results at 260 and I’ve had good results at 300. I think when you’re usually cropping your images and generally focusing in the middle of the frame, you’re going to be getting the sharper bit of the lens anyway. It’s the areas closest to the edge of the frame, I think, where problems can arise.
Shortcomings of this particular camera and lens? Not too many for me. It would be nice to have a full sensor camera with 40 megapixels and an even sharper lens that would allow me to focus closer in than 1.1m – for those times when butterflies are relaxed about you being there – but then we’d be talking about a camera and lens costing several thousand more. A faster auto focus would be nice too – but then the autofocus on this lens is considered to be pretty good as it is. I suspect that however fast the autofocus is it’ll never be fast enough. It’ll always be frustrating when the lens labours to find focus and you know the butterfly is going to flit away at any moment.
All in all, this combination of camera and lens, which costs about £1000 at the time of writing, has resulted in some pictures I’ve been more than happy with. In fact I’ve sometimes been amazed at the sharpness that this amateur enthusiast set-up can achieve.
